Wondering how to cook dried beans so they turn creamy instead of staying hard in the middle? Sort them, rinse them, choose the right soak, salt the cooking water, and simmer until the centers are soft. That is the whole job. The details below keep the batch from turning gritty, bland, or overcooked.
How to sort and rinse dried beans
Start with a clean sheet pan or baking tray. Pour the dried beans onto it and spread them into one layer. Pick out small stones, shriveled beans, broken pieces, and beans with dark holes or fuzzy growth. A few split beans are fine, but damaged beans can cook unevenly and make the pot muddy.
What to remove before soaking
Remove anything that is not clearly a bean. Stones are uncommon, but they still turn up. Discard beans that smell sour, look moldy, or have a wet, sticky surface. Old beans may look normal and still refuse to soften, so do not mix a very old pantry bag with a fresh one. Different ages cook at different speeds.
How to rinse dried beans
Transfer the sorted beans to a colander and rinse under cold running water for 30 to 60 seconds. Rub them gently with your hands so dust leaves the skins. Rinsing does not remove all the compounds that cause digestive trouble, but it removes loose dust and prevents dirty soaking water from becoming part of the finished dish.
Use a large bowl for soaking. Dried beans usually expand to two or three times their original size, so cover them with at least 3 inches of water. A 1-pound bag needs a bowl that holds at least 3 quarts. Skip the salt at this stage only if you plan to cook immediately; otherwise, a salted soak gives more even seasoning.
Which soaking method makes the best beans?
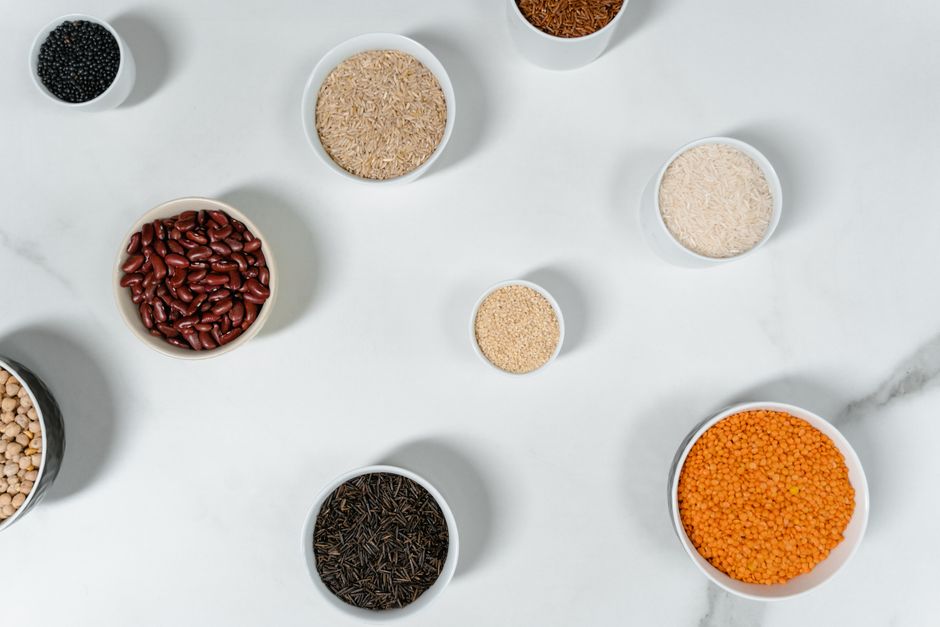
There are three useful choices: an overnight soak, a quick soak, and no soak. My pick is the salted overnight soak because it seasons the beans gradually and helps the skins stay intact. The quick soak works when dinner is close. No-soak cooking works too, but it takes longer and makes the final timing less predictable.
| Method | Water and timing | Best use |
|---|---|---|
| Salted overnight soak | 1 tablespoon kosher salt per 8 cups water; soak 8 to 12 hours | Best texture and even seasoning |
| Quick soak | Boil beans in plenty of water for 2 minutes; rest covered for 1 hour | Same-day cooking |
| No soak | Rinse, cover with water, and simmer 1.5 to 3 hours | Small batches or forgotten prep |
When the overnight soak is worth it
Use it for large navy beans, chickpeas, kidney beans, or any batch you want to cook evenly. Drain the soaking water, rinse once, and start the beans in fresh water. The soak shortens cooking time, but it does not guarantee tender beans if the beans are extremely old or the cooking water is hard.
When to skip soaking
Skip soaking when you need beans today or when you are using a pressure cooker. Add roughly 20 to 30 minutes of simmering time for unsoaked beans, then test them instead of trusting the clock. A no-soak batch can be excellent. It simply needs closer attention near the end.
When should you add salt and seasonings?
Salt the beans from the beginning. The old warning that salt makes bean skins tough is wrong for normal cooking. Salted soaking and cooking water season the beans inside and out, and the beans are less likely to split as they soften.
How much salt to use
For 1 pound of dried beans, use 1 tablespoon of kosher salt in the soaking water, then taste the fresh cooking liquid before adding more. If you skipped the soak, add the same amount to the cooking pot. Table salt is denser, so use about 2 teaspoons instead of 1 tablespoon. The liquid should taste pleasantly seasoned, not briny.
What to add to the pot
Add an onion half, garlic cloves, bay leaves, a carrot, celery, or a strip of kombu if you like. These add background flavor, but they do not replace salt. Add black pepper early, but hold acidic ingredients such as tomatoes, vinegar, lemon juice, and wine until the beans are tender. Acid can keep their skins firm and leave the centers chalky.
Do not dump every spice into the pot at once. Cumin and smoked paprika can become dull after hours of simmering. For a cleaner flavor, season the cooking liquid lightly, then finish the tender beans with olive oil, herbs, chili, vinegar, or roasted garlic. The best beans taste good before they meet a sauce.
How do you cook beans and know when they are done?
Put the soaked, drained beans in a heavy pot and add fresh water until it sits 2 inches above the beans. Bring the pot to a boil, then lower the heat to maintain a gentle simmer. Keep the lid partly open. A hard boil bursts the skins and turns the outside mushy before the center cooks.
Stovetop timing that actually works
Small black beans may take 45 to 90 minutes after soaking. Pinto, cannellini, and navy beans often need 60 to 120 minutes. Chickpeas can need 90 minutes to 2.5 hours. Unsoaked beans take longer. Start checking 20 minutes before the shortest estimate, because bean age, water hardness, pot shape, and simmer strength all change the result.
Keep the beans covered with water. Add hot water if the level drops below the beans. Cold water stops the simmer and stretches the cooking time. Avoid stirring often; move the pot by its handles instead. If the beans foam during the first 15 minutes, skim the foam, but do not chase every bubble.
The reliable texture test
Take out three beans from different parts of the pot. Let them cool for a few seconds, then bite them. Done beans have creamy centers with no chalky, grainy, or waxy spot. Their skins may be intact or slightly split, depending on the variety. If one bean is tender and two are firm, keep cooking. A knife cutting through the skin is not enough; the center is the test.
Turn off the heat when the beans are tender but still hold their shape. Let them sit in their liquid for 15 to 20 minutes before draining. This brief rest helps the centers finish softening and keeps the batch from drying out.
Why do beans stay hard?
Hard beans usually have a clear cause. Do not keep boiling blindly. Check these failure points in order:
- Old beans: Beans stored for years can develop hard-to-soften centers. If the skins wrinkle and the centers stay firm after three hours, replace the batch.
- Acid too early: Tomatoes, vinegar, citrus, and wine can delay softening. Add them after the beans pass the bite test.
- Hard water: Mineral-heavy water can slow cooking. Use filtered water for the next batch, especially if beans soften unevenly.
- Weak heat: A pot that barely moves never reaches a steady simmer. Look for small bubbles around the edges and across the surface.
- Too little water: Exposed beans dry out and cook unevenly. Keep 1 to 2 inches of water above them.
- Mixed batches: Do not combine a fresh bag with beans left at the back of the pantry. They may need very different cooking times.
What not to do when beans are tough
Do not add baking soda unless you accept a softer, slightly slippery texture and a duller flavor. It can help in an emergency, but it is not a fix for ancient beans. Do not add more salt as a panic move either. Salt will season the beans; it will not rescue a batch that needs another hour of cooking.
When a pressure cooker makes sense
Use a pressure cooker for unsoaked beans, large batches, or weeknight cooking. Cook below the maximum fill line because beans foam and expand. Exact times vary by bean and machine, but many soaked beans finish in 8 to 15 minutes at high pressure, while unsoaked beans often need 25 to 40 minutes. Natural release gives the skins a better chance of staying whole.
How should you store and use a big batch?
Cool cooked beans quickly. Drain them only if you already know you will use them dry. For storage, keep the beans in enough cooking liquid to cover them. That liquid protects the skins and gives you useful bean broth for soups, grains, and sauces.
How to refrigerate or freeze cooked beans
Spread the hot beans into shallow containers so they cool faster, then refrigerate within 2 hours. Use refrigerated beans within 4 days. For freezing, portion 1 to 2 cups into airtight containers or freezer bags, add a little cooking liquid, and leave room for expansion. Label the date. Frozen beans keep their best texture for about 3 months, though they remain safe longer when continuously frozen.
Plain ways to use tender beans
Warm them with olive oil, salt, and black pepper. Spoon them over toast. Toss them with rice and wilted greens. Mash pinto beans with a little cooking liquid for a simple filling. Add chickpeas to a grain bowl or blend white beans with garlic and lemon for a quick spread.
Reheat gently in their liquid. A splash of water brings back the creamy texture; a hard boil can split the skins. Store the batch plain, then season each portion for its meal. That gives you more options than turning the entire pot into one heavily spiced dish.